InfraRed - musings on white balance/equalisation in Imagetoolbox
The starting point for infrared photos is the white balance. Most camera apps/cameras can't get to a low enough colour temperature for this to happen as part of the photo taking, especially if you are using a 720nm filter over a normal lens/sensor.
There are a set of strategies for setting white balance (& there is a color temperature filter in Imagetoolbox), but the simplest automated approach would seem to be to equalise the histograms of the individual channels in the image. Gimp does this by setting the black & white points using the 0.05%/99.95% limits & stretching the rest of the channel to fill it.
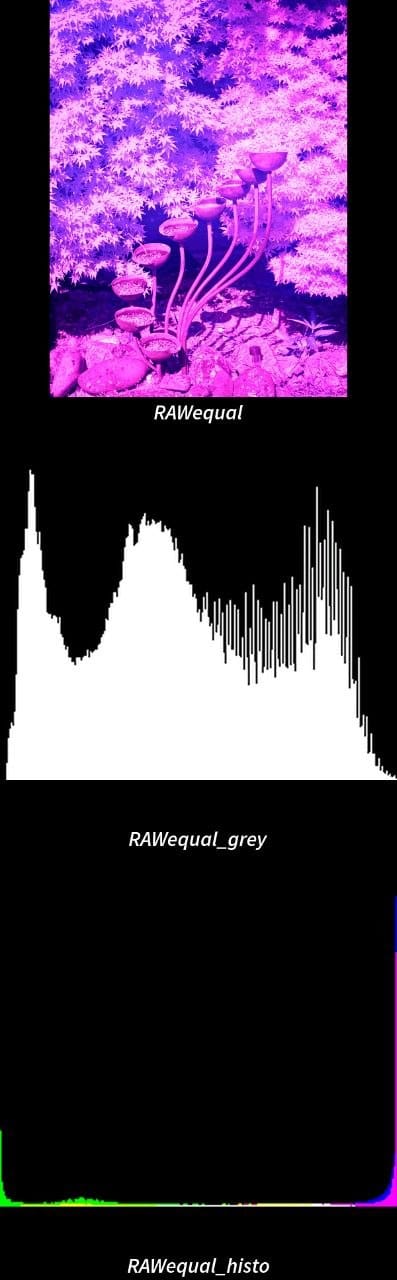
You can do the same thing using image toolbox (in termux) using the following command (which generates a png with the alterations & a gif with a histogram so that you can see things visually). The second command takes the white balanced image, resizes it to a single pixel & then returns the RGB value as text .
To save downloading extra images I've not put the RAW file here - you can see it later on in this page.
magick RAW.jpg -channel RGB -contrast-stretch 0.05%x0.05% -write histogram:RAW_rgb.gif RAW_rgb.png

magick RAW_rgb.png -resize 1x1 -format "%[fx:int(255*r)],%[fx:int(255*g)],%[fx:int(255*b)]\n" info:
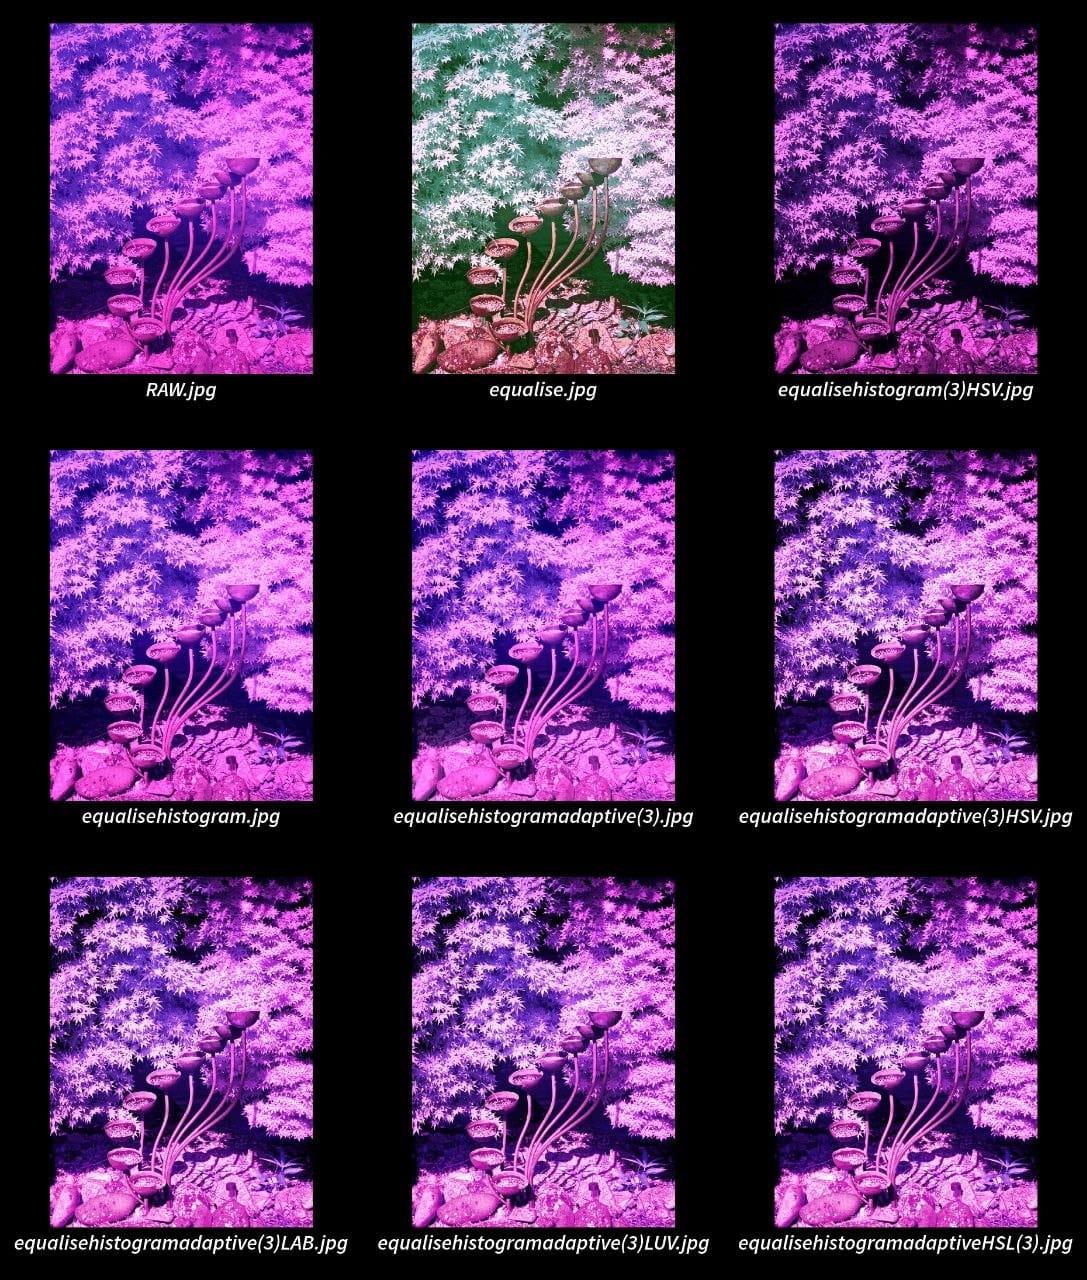
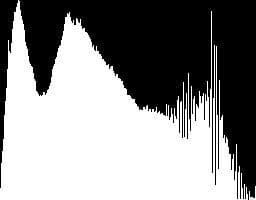
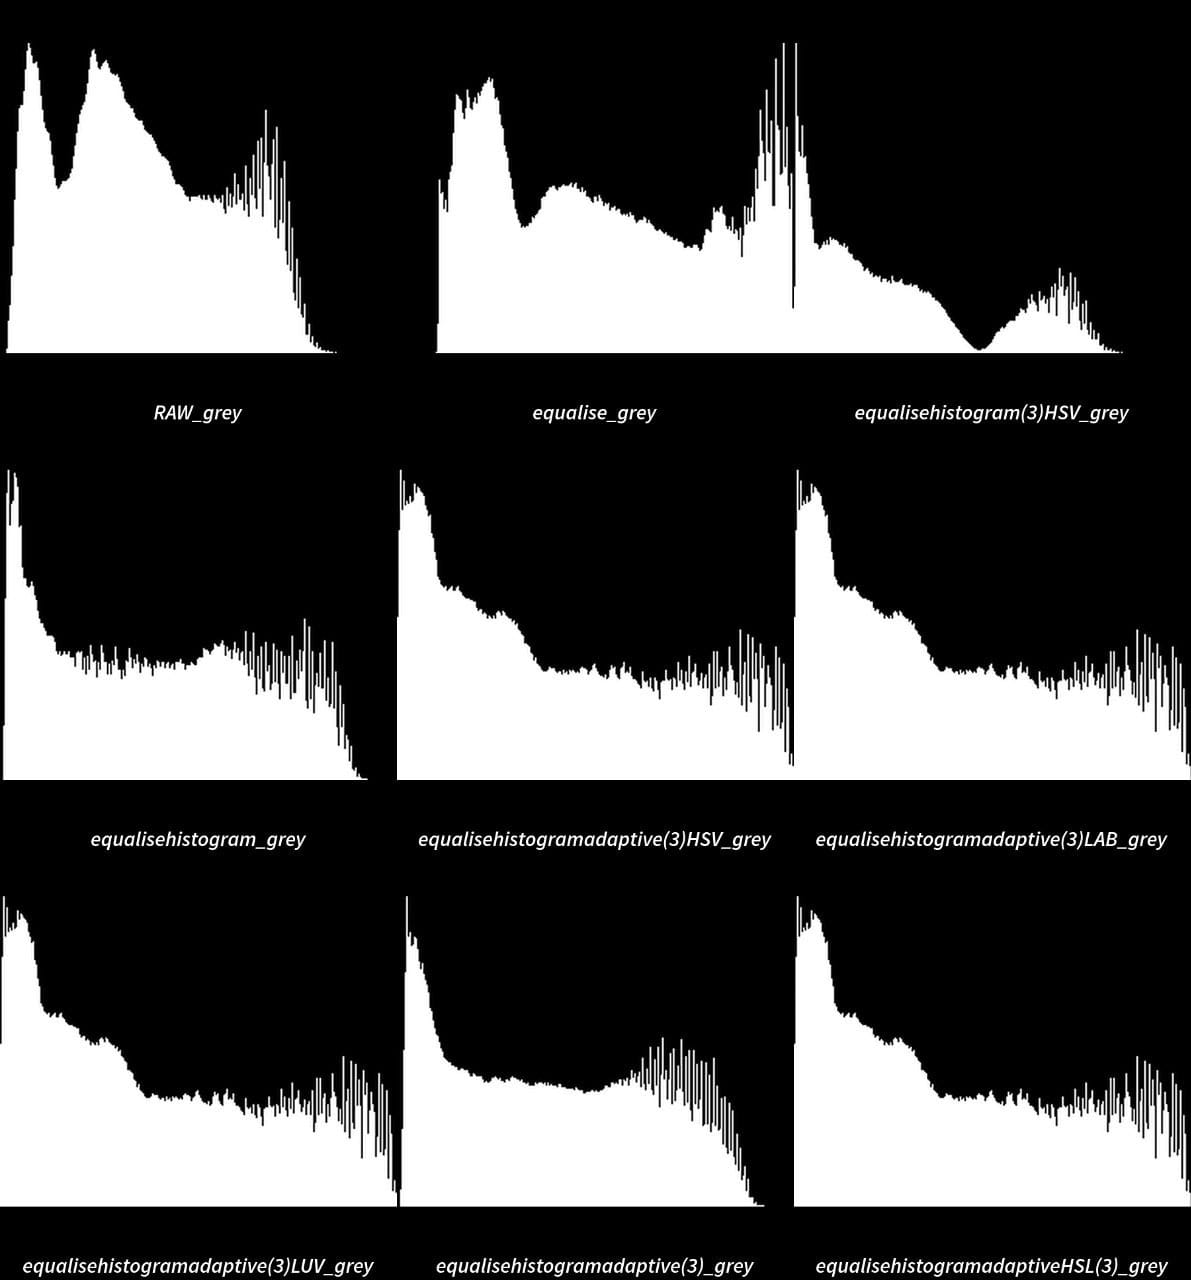
Imagetoolbox has a set of equalise functions, which I've run over the same RAW image & analysed using image magick & a bit of scripting (I'll put that at the end of the page). You can see the contact sheet for the images, histograms & average RGB values in the next couple of images, labelled with the filter used. The (3) is the pixel width & height used in the adaptive filters.
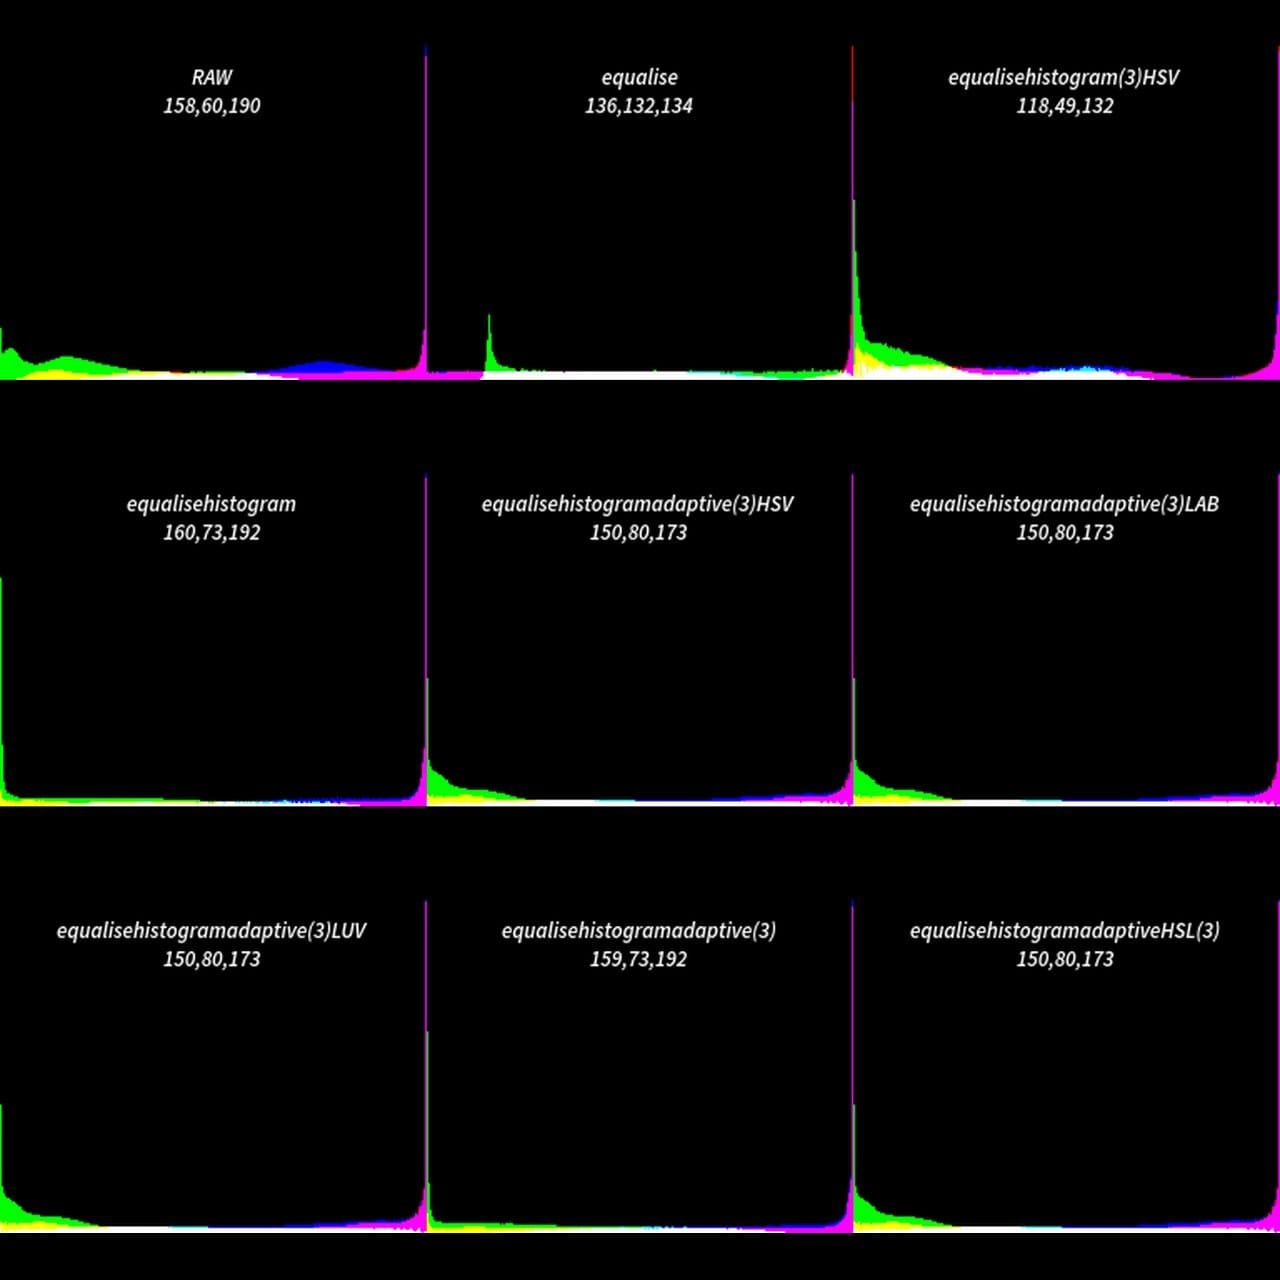
The RGB values look like this (in order of the red channel value). I've calculated the proportion of the total for each channel & the ratio relative to the green channel for some of them:
EqualiseHistogramHSV 118,49,132 (0.39,0.16,0.44 or 2.4,1,2.69)
Equalise 136,132,134 (0.34,0.33,0.33 or 1.03,1,1.02)
EqualiseHistoAdaptiveHSV 159,73,192
EqualiseHistoAdaptiveHSL 159,73,192 (0.38,0.17,0.45 or 2.18,1,2.63)
EqualiseHistoAdaptiveLAB 159,73,192
EqualiseHistoAdaptiveLUV 159,73,192
RAW 158,60,190 (0.39,0.15,0.47 or 2.63,1, 3.16)
Contrast Stretch (gimp) 154,82,178 (0.37,0.2,0.43 or 1.88,1,1.21)
EqualiseHistoAdaptive(3) 159,73,192
EqualiseHistogram 160,73,192
It's a bit hard to tell, but I think that the majority of the equalise functions are stretching the greyscale histogram to cover the full range, or alternatively that the equalise filter is targeting a neutral grey over preserving a colour channel distribution. I think that there are potential advantages to both versions, but you definitely get less added false colour if you aren't using the equalise filter.
Here's the bash (termux) script to take the jpg files that I created using each equalise filter (all in the same directory) & process them. It reads the jpgs & produces a histogram (as a gif), shrinks to a pixel & saves the RGB values in a text file. Then it reads the gif files & overlays the RGB values, saving them as a png. The images & histograms are then turned into the contact sheet that you can see above.
for f in ./*.jpg; do magick "$f" histogram:"${f}.gif";done

for f in ./*.jpg;
 do magick "$f" -resize 1x1 -format "%[fx:int(255*r)],%[fx:int(255*g)],%[fx:int(255*b)]\n" info: > "${f%.*}.txt";
done

for img in *.gif; do
  base="${img%%.*}"
  txt="${base}.txt"

  [ -f "$txt" ] || continue

  magick "$img" -background none -fill white -gravity center -pointsize 13  label:"$base\n$(cat "$txt")" -gravity North -geometry +0+10 -composite  "${base}_out.png"
done

magick montage $(ls *out.png | sort) -tile 3x3 -background '#000000'  -geometry 600x600+0+0 collage.gif

magick montage  -tile 3x3 -geometry 600x600+10+40 -label "%f" -pointsize 36 -background '#000000' -fill 'white' $(ls *.jpg | sort) collage2.gif
One more thing: image magick has an equalise function too: